All a flutter - Toilet Roll after Wedding Gift
Here is my take on a toilet paper roll mini album. I have to say I had THE best time making this. It was fun, stretched my imagination and I love how it turned out. I have to say I am now addicted to making these cuties and have gone from groaning and moaning everytime I walked into the bathroom and saw the toilet paper roll dispenser empty to actually looking to see how much is left so I can snag the cardboard roll. I know...way silly...but once you make one...you are hooked
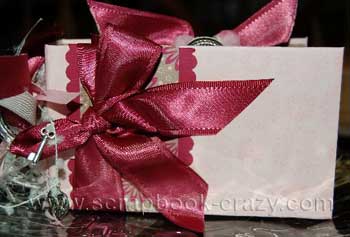
toilet roll after wedding gift
Gift for a friend
This toilet paper roll mini is something I am giving a friend of mine who just got married. This will be a perfect place for you to put special memories down, her favorite Bible verse(s), and pictures to remember the very special moments she would like to showcase. I did the photography for her wedding so in the CD I gave her of all of her pics I chose about 20 pics and sized them for her if she wanted to use them. They were the special parts of the wedding that I thought she would enjoy and they are all ready for her to print and add if she wants.
Making my album
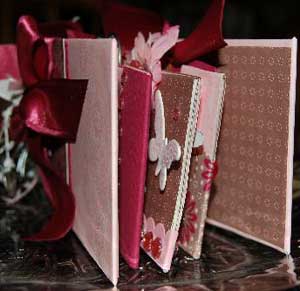
I started with three empty rolls and felt comfortable with that amount. It seemed when I added a fourth or fifth roll, it made the book too bulky or large...or something. I know the next one I make will be with four roll but this one and for the cover I wanted to make, three empty rolls was perfect. However, I did not want them to be the traditional flat roll with the tag sticking out the end. I wanted the tags, on this one anyway, to be accessed from the top so I searched on a site called Following The Papertrail (actually it is a blog...Laura is the absolute bomb of making minis) and she does minis with envelopes...no empty toilet paper rolls (yet) just envelopes and paper bags. Well, I used the toilet paper roll like one of her envelopes.
-
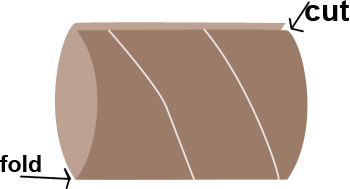 I
cut the toilet paper roll straight along the top and flattened out the toilet
roll.
I made a template of the roll flattened to keep for measurements and ideas.
-
 I then scored 1/4" down each side, cut off the pair of strips on the front so
now back side is wider than the front. I folded the scored back edges in
but before attaching I covered the entire roll with card stock and took my 1"
circle punch to notch out an area so I could insert tags.
-
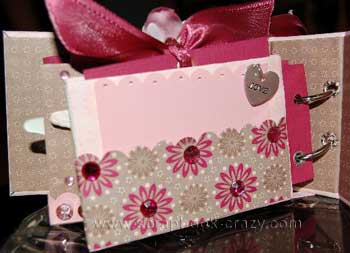
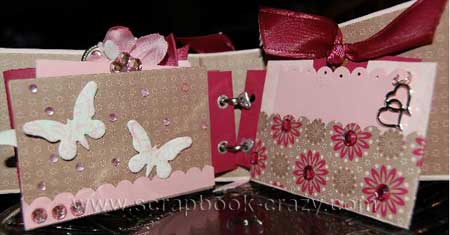
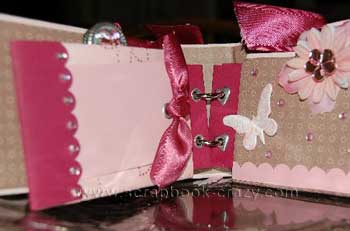
Before I sealed up the sides I took a coordinating piece of red card stock, roughly 2 1/2" square, folded it in half and glued it in the roll on the left scored sides. This is how I ended up binding my pages together in the book. If you look at the picture I used silver heart eyelets that I set so wear and tear on the pages would be minimized. I did all three empty toilet paper rolls the same way just used the Stampin Up coordinating DP and just started building my mini.
Once I finished all the pages I really wanted to do something special and well, keepsake beautiful for my friend. Something that would last or that she would want to put on her dresser in her room so I came up with a type of binder type thing using the book rings to hold the pages.
The front, spine, and back are made from drink coasters that I was given (had to ask) to me by a waiter at a restaurant that we ate at a while back. -
I measured my pages and cut the coaster 1/4" larger and the spine the same, about 1/4 inch larger.
-
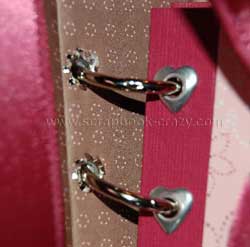 I measured the binder rings and drew circles on the inside of the coaster
(center piece/spine) and then laid my pieces down flat and spaced them two
widths of coaster board thickness apart (whew, are you following that...I think
I need to do a tutorial). This allowed enough allowance to let the book close
and open. If you would have put them right next to each other you could not
close the book because they would have been bunched together.
 -
I cut my patterned paper 1/2 inch bigger than the coasters and attached with glue. I then mitered the corners and glued them in place.
-
Before I put the inside lining on I used by crop-a-dile (hole punch tool) and punched holes where I needed them for the binder rings (drew circles earlier...makes it easier).
-
I then cut a piece of coordinating paper to fit then inside, attached it with glue and then punched out holes again using the already punched holes as a guide.
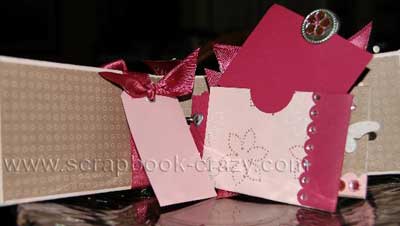
Almost done! Hang in there with me!!
-
I then set eyelets in those holes, fed the ring binder clips in the holes and put the pages in place. I embellished the heck out of everything and wahlllaaaa...my All-A-Flutter toilet paper mini scrapbook is done!
Whew! I hope you enjoyed my entry. It was sooooo much fun to make and I love how
it turned out. I am definitely making more for sure.
Thanks so much for the idea and opportunity to show my creation. I am so loving an empty toilet paper roll now and love, love, love this scrapbook-crazy now that I have found you. I also want to say thanks for all the entries and tutorial on this subject. The ladies who have entered this contest have done some amazing work and truly inspired me to make or at least take a chance on trying and entering my rendition of a toilet paper roll mini scrapbook.
Crystal
Blooming Color
See also
More toilet paper roll craft
ideas
Toilet roll mini album
tutorial
Scrapbook mini album gallery

