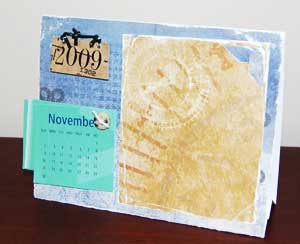
Making Calendars for your desk
Making calendars for your friends and family? Try these cool 2009 calendars made from cardboard.
You can print off a small calendar on plain paper to attach to this calendar. I find that the calendars that you find on company writing pads are good to use. You know the really big ones that lay on your desk that you scribble on then rip off and throw away. They're perfect to cut out the calendars and there are lots of them. For this sized calendar the months should be approx 2½" x 2" but all the measurements are adjustable.
 Materials
- 12" x 6" Strip of thick cardstock or cardboard
- 5¾" x 4½" cardstock front cover
- Photo mat - approx 3½" x 4"
- Patterned paper and scrapbooking embellishments
- button or brads plus extra embellishments
- adhesive - glue stick or double sided tape
- paper trimmer, scissors or craft knife
- Calendar months printed onto paper (not thick paper or cardstock)
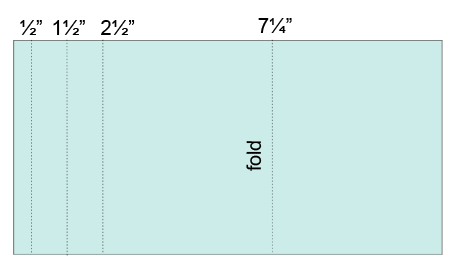
Take your strip of cardstock. Score a fold at ½", 1½", 2½" and 7¼" down the length of the strip.
Fold the strip to create the base of our calendar as in the
picture below. Use double sided tape or a glue stick to adhere the ½" tab inside
of the back cover.
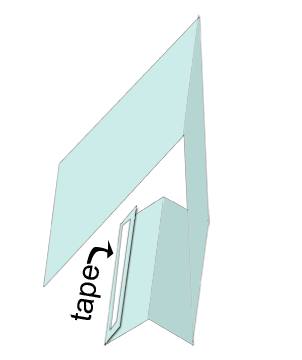

Once you have the body assembled you can put it aside while you create the calendar front.
Take your 5¾" x 4½" calendar front cover and embellish with a photo mat and the calendar. Lay the months on top of each other on the calendar front and use a piercing tool to pierce a hole or two through the lot. Use brads or a button to attach the calendar to the cover. When the month is over you simply rip it our ready for the next one.
When you have finished embellishing the calendar front attach it to the Body.
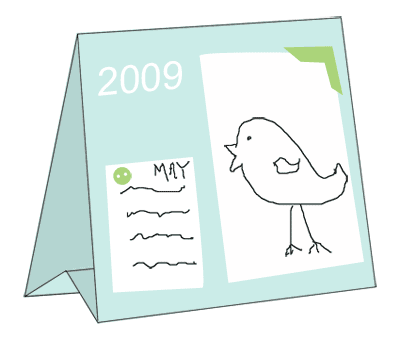
This is a calendar I made for 2009. I have heavily distressed some vintage type papers with a small piece of sandpaper.
